
by Bobby Menker, CJF APF
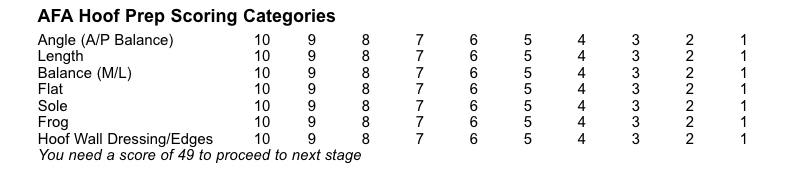
One of the best ways to prepare for the practical portion of the AFA certification test is to study the guidelines set forth in the AFA pamphlet “Guidelines for Evaluating Farrier Competitions and Certifications” and incorporate them into your everyday shoeing.
The accompanying photographs outline proper hoof prep as desired for certification as well as illustrating some of the common errors seen by examiners. It is important to note that all hoof prep must be completed and will be judged before you can proceed to the next step of nailing on the shoe.
The benefits of integrating these guidelines into your daily shoeing are twofold. Not only will you gain experience that will help you formulate your game plan for test day, but the principles outlined in the guide result in a nice, solid shoeing, definitely an asset to your business.
-
- Photo 1
-
- Photo 2
-
- Photo 3
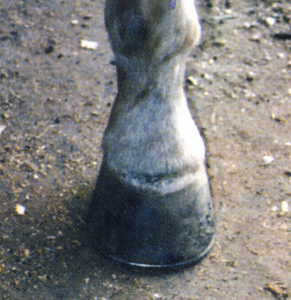
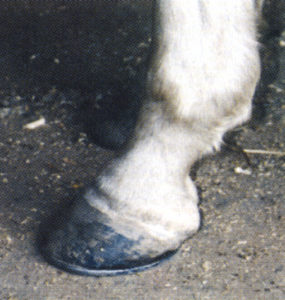
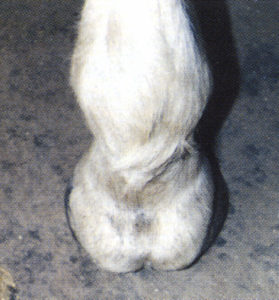
Photos 1, 2 and 3: It has been 7 weeks since the last shoeing. The foot runs forward and carries a medial toe flare.
-
- Photo 4
-
- Photo 5
-
- Photo 6
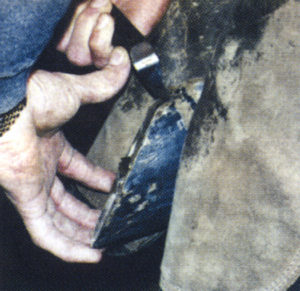
Photo 4: Clean bulb and heel area. Start to establish the widest portion of the frog using the angle of the heel.
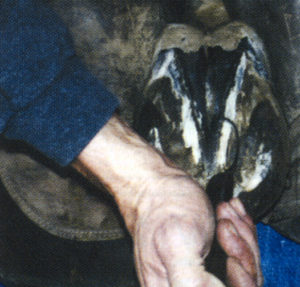
Photo 5: Paring the frog, keep it neat and smooth. Keeping the knife straight up allows you to establish a solid frog
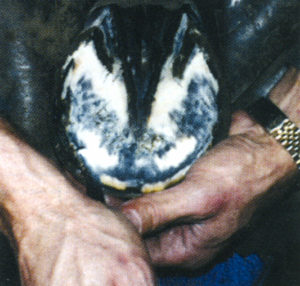
Photo 6: Prep the sole. You want it to be smooth and not weakened by over-paring. Bars should be solid and the sole should not give to thumb
pressure.
-
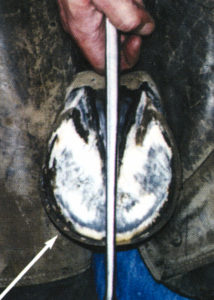
- Photo 7: Check how the foot centers around the frog. Note how the toe pulls to the medial side.
-
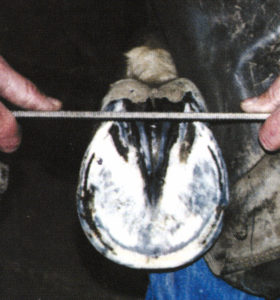
- Photo 8: The foot was trimmed with the nippers and the heels were brought back to the widest portion of the frog.
-
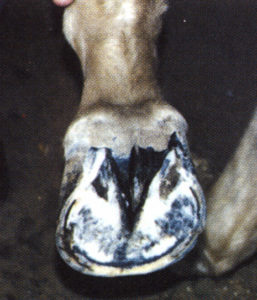
- Photo 9: Check balance by using the long axis of the leg.
-
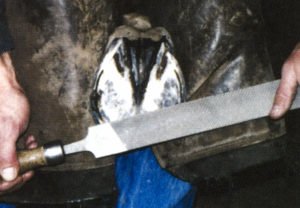
- Photo 10: Level the foot trying to establish a flat surface to have solid contact with a flat shoe.
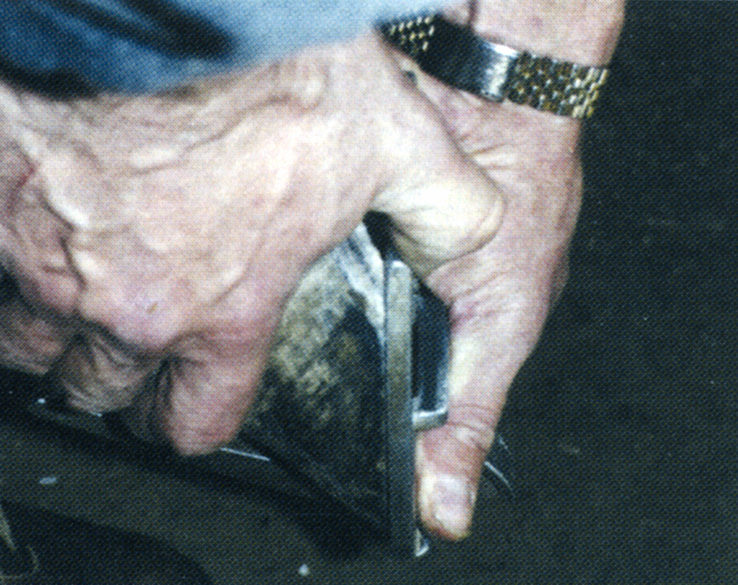
Photo 11: Check for a flat surface.
-
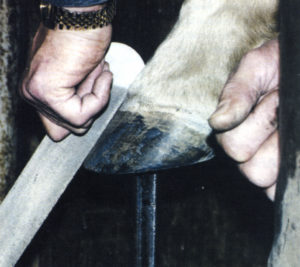
- Photo 12: Use edge of finish file or rasp to check dishes and flares.
-
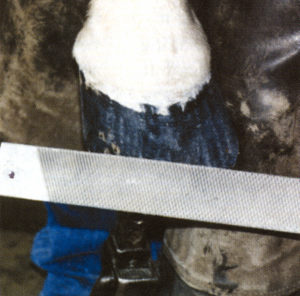
- Photo 13: Using the fine side of the finish file. Try to improve the natural shape of the hoof and remove any deep gouges or rasp marks in the wall.

Photo 14: Sand block the wall and the back of the heel area to smooth everything. This helps to give a nice finished appearance.
-
- Photo 15
-
- Photo 16
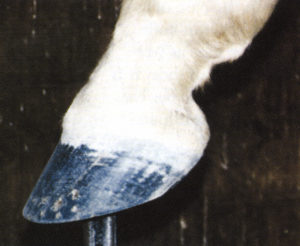
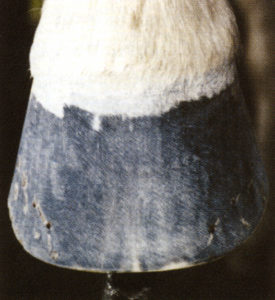
Photos 15 & 16: These show the finished job. The wall is smooth and straight with no deep rasp marks or gouges. The edges are smooth and rounded so that there is no injury to yourself, the horse or the examiner. The toe is not dubbed and the dishes and flares have been dressed without endangering the nailing job.

Photo 17: Lateral view, resetting the same shoes. Shows how much improvement was made through good hoof prep.
The mistakes shown in photos 19-24 would result in scores less than 6.
-
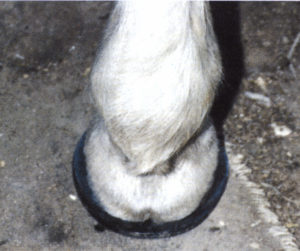
- Photo 18: Posterior view showing heel support with the fetlock in the center of the hoof. The shoe fit in the last two photos are not to certification standards.
-
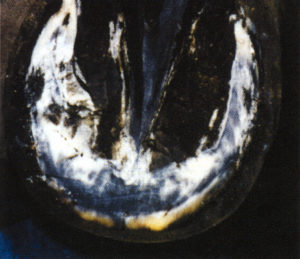
- Photo 19: The frog is over-pared. The knife was laid over against the frog when it was cut. The sole is not pared smooth. There is a knife mark left in the toe area and the bar and heel area are left untouched.
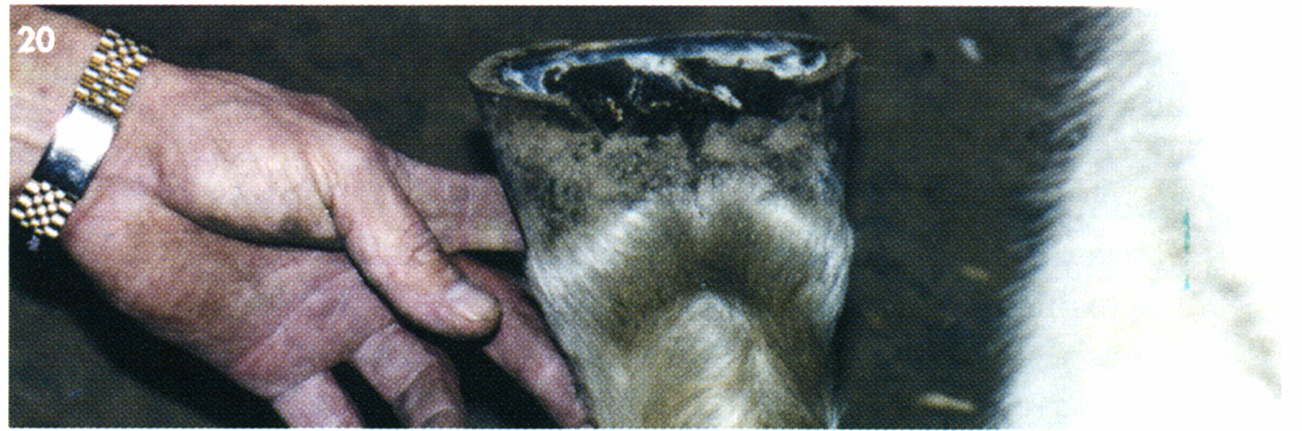
Photo 20: The foot has been trimmed out of balance. The bulb area has been left untouched.
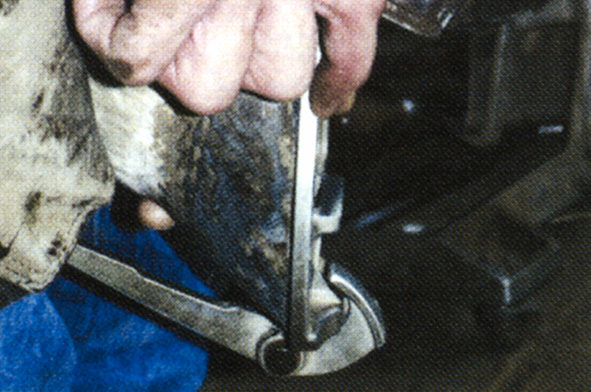
Photo 21: The bottom of the foot is not level. There is a gap in the toe and quarter area.
-
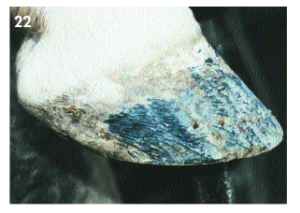
- Photo 22
-
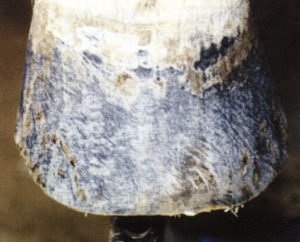
- Photo 23
Photo 22 & 23: The dish in the toe hasn’t been dressed. Deep rasp marks are left in the wall. The heel area hasn’t been touched and the edge is not smooth.

Photo 24: You will be stopped for drawing blood, unless an AFA examiner feels that it could not be helped.
This article is from The Natural Angle Volume 4, Issue 4 – written by Bobby Menker. For more Natural Angle articles and tips, click here.
Bobby Menker, CJF APF
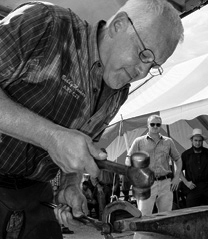 Bobby Menker is an AAPF/CAPF Accredited Professional Farrier (APF) and an AFA Certified Journeyman Farrier (CJF) with over thirty years of experience shoeing Western and English Performance horses. His clients include multiple AQHA World Show and Congress champions, NRHA futurity and derby winners, as well as successful Grand Prix competitors. His specialties include supportive shoeing for the high-level athlete. A past AFA Examiner and frequent clinician, Bobby has been consistently involved in efforts to bring more educational opportunities to farriers.
